Ever have one of those days? You know where you’re going through the motions. You’re doing your thing. And then your auto-pilot takes you on a little detour? I have …
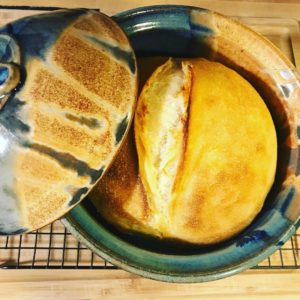
Our No-Knead Bread Baker is one of our most popular pots. The lid has the perfect dome to form a air pocket that in turn forms a crust that makes a gorgeous boule every time. It’s designed with a glazed rim, that flares out. So the bread, once baked can easily slide out onto the cooling rack. Our bread baker is in use at least once a week.

As you know, as the second generation owner of this small business, I’m the Coyote Kid. This means I have a lot of classic coyote pots that I’ve collected for the last two-and-a-half decades. Some of you could probably rival me with pottery per shelf ratios. And many of my pots were one-offs that never saw the light of the Gallery. I have an old large casserole from circa 2003 that I love. It’s great for baking, for keeping mashed potatoes warm before serving, and for hot dish. The casserole is different than the bread baker, it has a smaller opening where the rim comes in just a little.
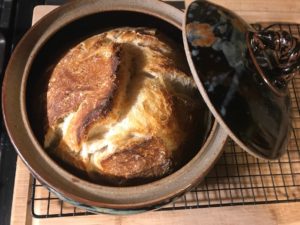
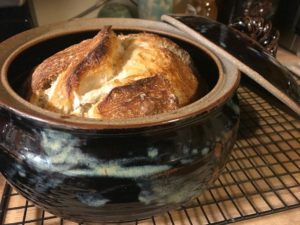
At our house the bread baker is in Joe’s Blues and the casserole is in Midnight Garden. So I’m tooling along on auto-pilot and making bread. Half way through I think …. hold the phone, what color pot is in the oven!?!? Shoot. The answer was not Joe’s Blue.

Yup, years of making casserole and bread and I screwed it up. At first I thought the dough would blow the top off. It didn’t. Phew.
Now, for the real challenge. How the heck am I going to get the bread out? I had visions of dicing it up and turning it into croutons.
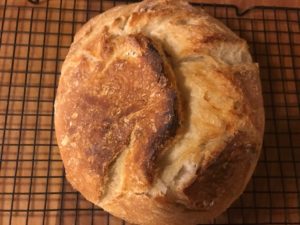
Luck had it, I was able to poke, pry, and squish it with the skills of a low-budget surgeon. The little sucker popped out! It was a little squished in and I massaged it back into a pretty good looking ball..
It tasted great. But from now on I know Blue = Bread.
And I probably won’t screw that one up again….probably.
Looking for the recipe that we share with each no-knead bread baker? Here ya go!
 Time: About 1½ hours plus 12 to 16 hours rising
Yields one 1 1/2 pound loaf
- 3 cups all-purpose or bread flour, more for dusting
- ¼ teaspoon instant yeast
- 1¼ teaspoons salt
- Cornmeal or wheat bran as needed
In a large bowl combine flour, yeast and salt. Add 1 5/8 cups water, and stir until blended; dough will be shaggy and sticky. This can be done in the Clay Coyote No-Knead Bread baking bowl to save washing an extra bowl.
Cover bowl with plastic wrap or put the lid on.
Let dough rest at least 12 hours, preferably about 16, at warm room temperature, about 70 degrees. Our house gets cold at night so we often use a heating pad on low around the bowl in the dead of winter.
Dough is ready when its surface is dotted with bubbles like a sponge.
Lightly flour a work surface and place dough on it. Using just enough flour to keep dough from sticking to work surface or to your fingers, gently and quickly shape dough into a ball.
Generously coat a cotton towel (not terry cloth) with flour, wheat bran or cornmeal; put dough seam side down on towel and dust with more flour, bran or cornmeal. Cover with another cotton towel and let rise for about 2 hours.
When it is ready, dough will be more than double in size and will not readily spring back when poked with a finger.
Clean up bowl, if used for rising, while bread rises under cloths.
At least a half-hour before dough is ready, heat oven to 400 degrees. Put your Clay Coyote No-Knead Bread bowl with lid in oven as it heats with out the dough.
When dough is ready, use heat-pads to remove pot from oven.
Slide your hand under towel and turn dough over into pot, seam side up; it may look like a mess, but that is okay.
Shake pot once or twice if dough is unevenly distributed; it will straighten out as it bakes.
Cover with lid and bake 30 minutes, then remove lid and bake another 15 to 30 minutes, until loaf is beautifully browned.
Cool on a rack…
